
How to Start a Clothing Brand in Australia (2026 Guide)
Low Cost, Easy Steps On How To Start a Clothing Brand in Australia- With Little to No Money
 Dreaming of starting your own clothing brand but unsure where to begin? View our updated guide for 2026 here. Whether you want to launch a women’s fashion label, create your own streetwear collection or build an online clothing boutique, turning your ideas into a profitable fashion business takes more than great designs.
The good news? You don’t necessarily need a huge investment, a fashion degree or years of industry experience to start a clothing brand. With the right knowledge, a clear business strategy and a carefully planned collection, it’s possible to begin with a relatively small budget.
In fact, starting a clothing brand with $5,000 AUD can be achievable if you take a lean approach, minimise unnecessary expenses and focus on testing your designs before committing to large production quantities.
However, there’s an important difference between launching a clothing brand and building a profitable fashion business.
Many new designers make the mistake of investing heavily in clothing production before understanding their target customer, manufacturing costs, retail pricing or how they’ll actually sell their collection.
I’m Annette Miller, Course Principal at La Mode College. I’ve spent years working in the fashion industry, developing collections, working with manufacturers and building my own fashion businesses, including a resortwear label that was sold internationally.
Through this experience, I’ve learned that the most successful fashion brands aren’t necessarily those with the biggest budgets. They’re the ones that make smart commercial decisions from the beginning.
In this guide, I’ll walk you through 10 essential steps to starting a clothing brand in Australia, including how to develop your designs, find clothing manufacturers, create professional tech packs, manage sampling and production, and prepare your first collection for launch.
I’ll also show you how to approach starting a clothing brand with just $5,000, including a practical startup budget and strategies to help you avoid expensive beginner mistakes.
Whether you’re starting a clothing brand from scratch or turning a creative passion into a business, these steps will help you build a stronger foundation for your fashion label.
 Can You Start a Clothing Brand with $5,000?
Yes, it is possible to start a clothing brand in Australia with $5,000 AUD, but your approach to product development, manufacturing and inventory will determine how far that budget goes.
If you’re planning to launch 15 different clothing designs, manufacture hundreds of garments and invest in professional campaigns before making your first sale, $5,000 is unlikely to be enough.
However, if you’re prepared to start small, develop a tightly edited collection and take a strategic approach to manufacturing, a $5,000 budget can provide a starting point for testing your fashion business idea.
The key is to think like a business owner, not just a fashion designer. You can see our article for avoiding costly mistakes when first starting out here.
Example: A $5,000 Clothing Brand Startup Budget
Here’s an example of how an aspiring fashion entrepreneur could allocate an initial $5,000 AUD budget.
| Startup expense | Estimated budget (AUD) |
|---|---|
| Fashion design and product development | $300 |
| Technical drawings and tech packs | $300 |
| Fabric sourcing and garment samples | $800 |
| Small-batch clothing manufacturing | $2,000 |
| Branding, labels and packaging | $250 |
| Ecommerce website setup | $200 |
| Product photography and content creation | $350 |
| Launch marketing | $500 |
| Contingency fund | $300 |
| Total | $5,000 |
These figures are an illustrative budget, not guaranteed supplier prices. They assume the founder completes much of the design, technical documentation, website setup and marketing themselves. They also exclude any additional taxes, duties, freight, registration costs or professional fees that may apply.
This budget is most realistic for a small test launch using relatively simple garments, accessible fabrics and low minimum order quantities.
For more complex garments, custom fabrics or larger manufacturing runs, your startup costs could be significantly higher.
Start with a Small Clothing Collection
One of the biggest mistakes new fashion entrepreneurs make is trying to launch too many designs at once.
You don’t need 20 styles to create a successful first collection.
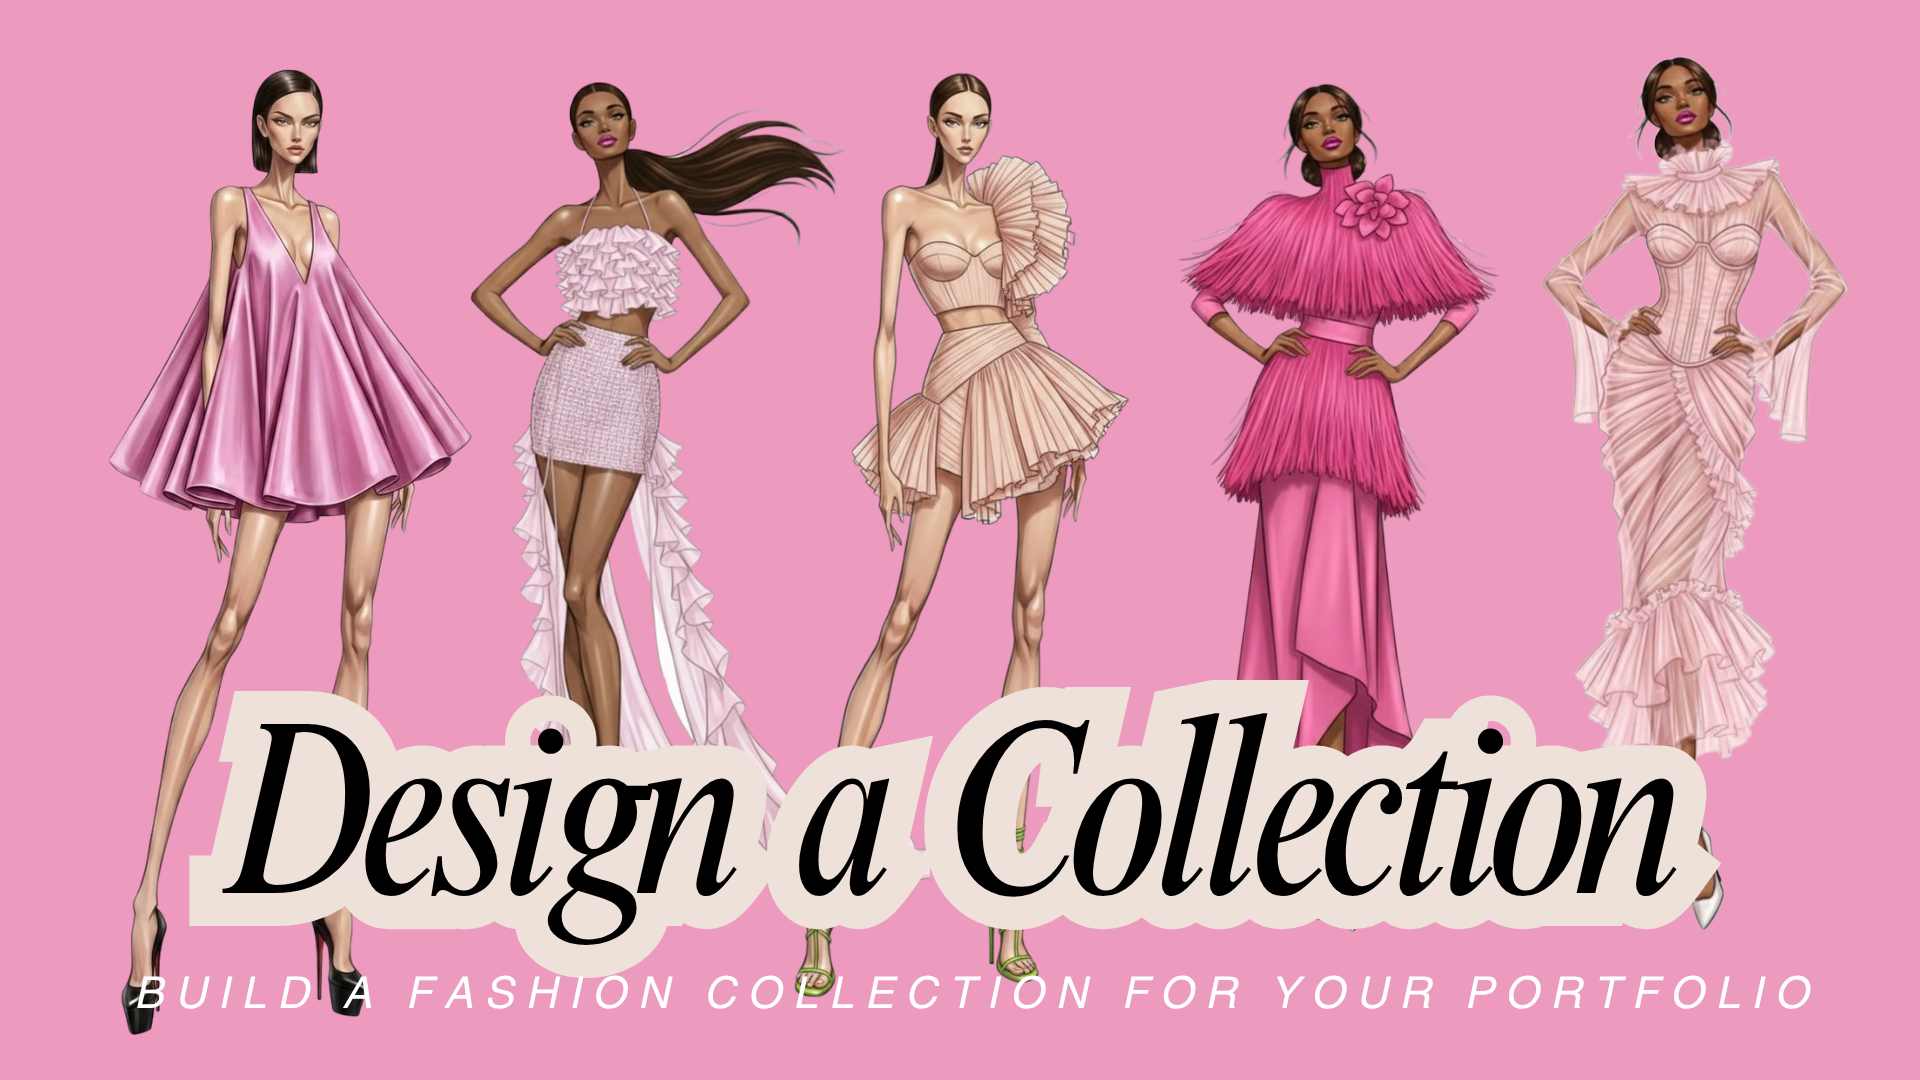
Instead, consider launching with just 10-15 carefully selected designs that appeal to the same target customer. ( can include the one design in different colours or prints)
For example, if you’re starting a women’s resortwear brand, your first collection might include:
- Three versatile summer dress.
- One- two matching top and shorts set.
- One oversized tshirt
- Two lightweight cover-ups
Each design should complement the others and reflect a consistent brand identity.
By limiting the number of styles, you can reduce development costs, simplify manufacturing and focus your marketing efforts on a smaller selection of products.
You may even choose to launch with just one signature product- in different colour combos and expand once you’ve established customer demand.
Understand Your Minimum Order Quantities
Before committing to manufacturing, you’ll need to understand your supplier’s minimum order quantity (MOQ).
An MOQ is the minimum number of garments a manufacturer requires you to order, sometimes calculated per style, colour or size.
For example, a manufacturer may require 50 units of each design.
If you’re launching three styles, that could mean committing to 150 garments before you’ve sold a single item.
With a $5,000 startup budget, this could quickly consume most of your available funds.
Look for manufacturers that offer small production runs, or explore made-to-order and preorder models where appropriate.
Remember that smaller production quantities often result in a higher manufacturing cost per garment. You’ll need to account for this when calculating your retail prices.
Consider Preorders Before Investing in Inventory
Another way to start a clothing brand with limited capital is to validate customer demand before committing to a full production run.
A preorder strategy allows customers to purchase selected designs before the garments are manufactured.
This can help you estimate demand, identify popular styles and potentially use customer payments towards production costs.
However, preorders require careful planning.
You’ll need reliable manufacturers, realistic production timelines and clear communication with customers about expected delivery dates.
Preorders don’t eliminate financial risk, and you’ll still need sufficient funds to cover sampling, manufacturing deposits, unexpected delays and any refunds.
Learn the Skills That Can Save You Money
When you’re starting a clothing brand with $5,000, every dollar matters.
Understanding how to develop your own fashion designs, prepare technical drawings, communicate with manufacturers and calculate production costs can reduce your reliance on expensive external services.
For example, learning how to create a professional garment tech pack can help you communicate your design requirements clearly and reduce the risk of costly sampling errors.
Similarly, understanding garment construction, fabric selection and manufacturing processes can help you make more informed decisions when working with suppliers.
The goal isn’t simply to launch a clothing brand as cheaply as possible. It’s to spend your available capital on the activities that give your business the best chance of success.
With a small budget, your first collection should be viewed as an opportunity to test your concept, learn from real customers and build a foundation for future growth.

My Top 10 Easy steps on How to Start a Clothing Brand in Australia…. (Successfully)
Before you even put pen to paper ad start designing for your clothing brand, it’s important to know who you will be selling clothes to, how much that group of people are willing to spend, and what they want.
Lets Go Into More Detail Below:
Step 1- Identify a Profitable Niche or Target Market and Create a Range Plan
Before you even put pen to paper ad start designing for your clothing brand, it’s important to know who you will be selling clothes to, how much that group of people are willing to spend, and what they want. Knowing what people want to wear/ or what motivates them to buy, is the secret sauce to starting your clothing brand. A range plan is like a ‘shopping list’ of items you want to include in your range, and the price points you want to target. For example- you might identify you target market mostly wears dresses, and occasionally likes matching sets. So, you might include in your range plan 6 dresses, 2 tops, 2 skirts, 1 pant, 1 jacket- all that interchange with one another. A range plan can be changed as you design, but it’s the starting point to help guide you in what needs to be created or designed for your target market that will buy your brand.
Top Tip: Facebook groups can be very useful for depicting a gap in the market or getting feedback on what a particular group of people like to wear/ want to wear. Join some groups relevant to your target market and start asking some questions. Making a ‘Client Avatar’ can be useful to laser pinpoint who your ideal customer is.

Step 2- Conduct Trend Research. Create a Story Board or Mood Board.
A mood board includes inspirational pictures that depict your trend direction, and include your Colour Palette, silhouettes, and fabric inspiration.
Professional Tip: Our top tip for creating a professional mood board is using www.canva.com a free online graphic design website- that has several drags and drop features. Simply upload your pictures you have downloaded from Pinterest or fashion sites and drag and drop into the template.

Step 3: Design Your Collection- Concept Illustrations.
Illustrate your design ideas using croquis or fashion illustration templates. A template is a body form that you can trace, then draw your designs on top. It helps you get the proportions right, and if you aren’t great a drawing, it’s a god send. At this stage you are just getting your design ideas out on paper. We have free female, male and kids croquis templates available here.
 Step 4- Present Your Collection Professionally Using Adobe Illustrator.
Use Adobe Illustrator to put your individual design ideas into a collection. In this step you are taking your best ideas from your concept drawings and finalizing the pieces that you will have in your collection. From here you are drawing your designs more professionally. The professionals in the industry use ‘Adobe Illustrator’ to draw what they call ‘trade drawings’ of each piece of clothing. These trade drawings are used in the ‘tech packs’ to send to manufacturers to make the clothing.
Tip: Using a program like ‘Adobe Illustrator’ can be tricky at first. We have e-classes on how to use it to create fashion drawings and have 100+ trade drawing files in Adobe illustrator you can download, then simply modify to your own design. This saves you from having to draw the design from scratch. See our program here:
Step 5- Select Fabrics.
Next step is to select fabrics for each of your designs. It can be tricky knowing the names of each fabric, so going to a local fabric store can be a great way to start to build a fabric library. Ask for 10cm of each fabric, (very low cost) and build a swatch collection at home. You can also request ‘fabric swatch’ cards from your manufacturer for free. But first things first- you need to learn the names of fabrics to know what to ask for. Looking at the tags at fabric stores, and the composition is a great way to start. Website to order fabric samples is:
Step 6- Preparing Your Designs for Sampling- Create a Tech Pack.
A Tech pack is basically construction details about the fit and construction of your design. Each design needs its own ‘tech’ pack that includes details like fabric, interior tags, and labelling, sewing details- like type of hem, and notions and trim details like type of zipper, button, or collar.
Tip: If you get stuck here, we cover tech packs in our ‘Start Your Own Fashion Line’ Program and include tech pack downloadable templates- to help you easily fill in the required information.
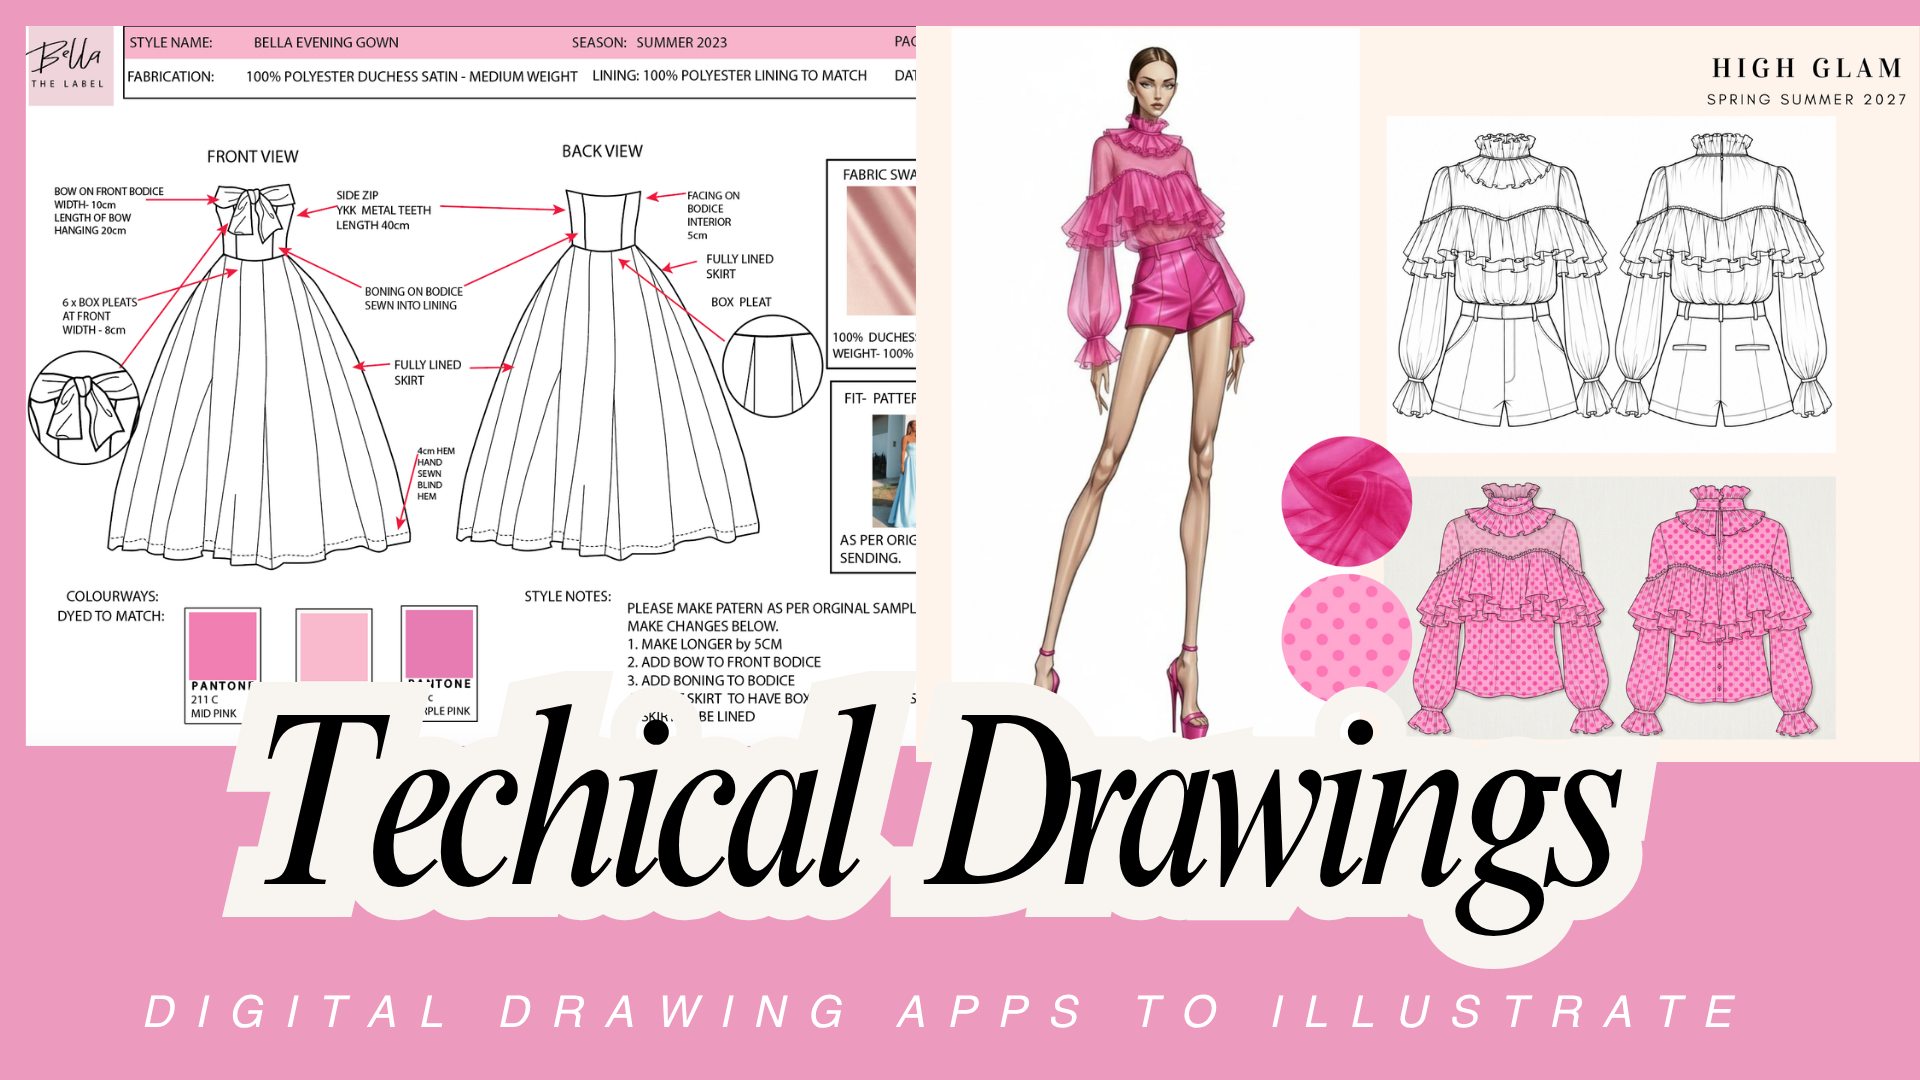
Step 7- How to Find a Clothing Manufacturer in Australia or Overseas
Finding the right clothing manufacturer is one of the most important decisions you’ll make when starting your own fashion label.
Your manufacturer will play a significant role in determining your garment quality, production costs, minimum order quantities and delivery timelines.
However, not every clothing manufacturer is suitable for a startup fashion brand.
Some factories specialise in large-scale production for established retailers, while others work with emerging designers and offer smaller production quantities.
Before contacting manufacturers, it’s important to understand what you’re looking for.
Should You Manufacture Clothing in Australia or Overseas?
There are advantages and disadvantages to manufacturing clothing locally or overseas.
Clothing Manufacturing in Australia
Australian manufacturers can offer advantages for emerging fashion brands, particularly when it comes to communication, quality control and logistics.
Potential benefits include:
- Easier communication and factory visits.
- Shorter domestic shipping distances.
- Greater visibility over production.
- Opportunities to work with local patternmakers and sample machinists.
However, Australian manufacturing can be more expensive, particularly for labour-intensive garments.
Some local manufacturers also have minimum order quantities that may be difficult for a small startup to meet.
Clothing Manufacturing in Bali, Indonesia
Bali has become a popular manufacturing destination for Australian fashion brands, particularly those producing resortwear, swimwear and casual clothing.
Having worked with manufacturers in Indonesia, I know how important it is to choose a factory that understands your product category and quality expectations.
Potential advantages include:
- Access to manufacturers experienced in resortwear and lightweight clothing.
- Opportunities for smaller production runs with some suppliers.
- Access to local fabrics, printing and garment development services.
- The possibility of visiting factories and overseeing sampling.
However, production quality, communication, technical capabilities and minimum order quantities can vary considerably between suppliers.
It’s essential to thoroughly assess a manufacturer before committing to production.
Clothing Manufacturing in China
China has an extensive clothing manufacturing industry with suppliers specialising in almost every product category, from activewear and streetwear to tailored garments and technical clothing.
Potential advantages include:
- A broad range of specialised manufacturing capabilities.
- Access to fabrics, trims and production technologies.
- Competitive unit pricing at suitable production volumes.
- Opportunities to scale production as your brand grows.
However, minimum order quantities can be higher with some manufacturers, and overseas production requires careful management of shipping, customs, quality control and communication.
How to Choose the Right Clothing Manufacturer
When researching manufacturers, don’t make your decision based on price alone.
Consider the following questions:
- Does the factory specialise in the type of clothing you want to produce?
- What are its minimum order quantities per style and colour?
- Can it develop patterns and samples from your technical specifications?
- What are the sampling and production costs?
- What is the estimated production timeline?
- How does the factory manage quality control?
- Can it provide examples of previous work?
- What are the payment terms?
- Who is responsible for shipping, import duties and customs clearance?
- Can it provide information about its labour practices and production standards?
If you’re starting a clothing brand with $5,000, finding a manufacturer willing to accommodate a small initial production run may be more important than achieving the lowest possible unit price.
We include a list of 50 good quality and trustworthy clothing suppliers in our ‘Start Your Own Fashion Line’ program here.
Why You Need a Professional Tech Pack Before Manufacturing
One of the biggest mistakes new fashion designers make is approaching manufacturers with only a photograph, Pinterest reference or rough fashion sketch.
While these references can communicate the overall design concept, they don’t provide all the technical information required to manufacture a garment accurately.
A professional fashion tech pack typically includes technical flat drawings, garment measurements, fabric specifications, construction details, trims, labels and other production requirements.
The more clearly you communicate your designs, the easier it becomes for manufacturers to provide accurate quotations and develop samples.
My advice: Never assume a manufacturer understands exactly what you want simply because you’ve shown them a picture.
Clear technical documentation can save considerable time, money and frustration throughout the manufacturing process.
Once you’ve shortlisted suitable manufacturers, the next step is to develop and approve your garment samples before committing to production.
Step 8- Get Samples Made: Develop and Approve Your Clothing Samples
Before manufacturing your first clothing collection, you’ll need to develop garment samples.
A sample is a prototype of your design, produced to test the garment’s fit, construction, fabric, measurements and overall appearance.
Sampling is an essential stage of fashion product development because a garment that looks beautiful in a fashion illustration doesn’t always translate perfectly into a finished product.
This is where your design concept becomes a physical garment.
What Happens During the Clothing Sampling Process?
Once you’ve provided your manufacturer with your technical specifications, the factory will typically develop an initial sample.
Depending on the manufacturer and your requirements, this process may involve pattern development, fabric sourcing, garment construction and fit adjustments.
When you receive your sample, carefully assess:
- Fit: Does the garment fit the intended body measurements correctly?
- Fabric: Does the material drape, stretch and feel as expected?
- Construction: Are the seams, stitching and finishing suitable?
- Measurements: Does the garment match the measurements in your specification sheet?
- Design details: Are the neckline, sleeves, pockets, closures and other features correct?
- Quality: Would you be confident selling this garment to a paying customer?
It’s common for a first sample to require adjustments.
You may need to change the garment length, improve the fit, modify a design detail or select a different fabric.
These changes should be documented clearly and communicated to your manufacturer before the next sample is produced.
How to Reduce Clothing Sampling Costs
If you’re starting a clothing brand with a limited budget, repeated sampling can become expensive.
Every additional sample may involve pattern adjustments, fabric, labour and shipping costs.
One of the best ways to manage these expenses is to prepare accurate technical specifications before the sampling process begins.
Make sure your manufacturer understands the required measurements, construction details, fabrics and finishing techniques.
Avoid making unnecessary design changes once sampling has started.
For example, changing your garment from a simple shift dress to a fully lined, fitted dress with additional panels may require substantial redevelopment.
Don’t Approve a Sample Based on Appearance Alone
A garment may look beautiful on a hanger but still have problems with fit, comfort or construction.
Where possible, arrange a fitting on someone who represents your intended customer.
Check how the garment looks and feels when standing, sitting and moving.
You should also consider appropriate wear and care testing, particularly if you’re developing garments using unfamiliar fabrics.
Once you’re satisfied with the design, fit and quality, you can approve the final sample for production.
Remember: The cost of correcting a problem during sampling is usually far lower than discovering the same problem after you’ve manufactured 100 garments.
Taking the time to get your samples right is one of the most important investments you can make when starting a fashion label.
Note: Making fit changes to prototypes or samples can be the hardest step in the process, as many new designs get very disheartened when their samples come in looking different to how they had in their heads. To be honest, there is so many times samples have come in looking like a dog’s breakfast. It’s just part of the design process. Starting your own clothing brand will mean you might have to -re sample your designs 2- 3 times before getting it right and moving to bulk production. Keep this in mind for your lead times and timing. In my ‘Start your own clothing line’ program I cover the most common fit mistakes in sampling, and how to communicate what needs to be changed with your manufacturer.
Step 9- Manufacture Your First Clothing Collection
Once your garment samples have been approved, you’re ready to move into clothing production.
This is an exciting milestone, but it’s also the stage where many new fashion entrepreneurs make their largest financial commitment.
Before paying a manufacturing deposit, you should have a clear understanding of your production quantities, garment costs, delivery timelines and expected profit margins.
How Many Garments Should You Manufacture for Your First Collection?
There’s no single correct quantity for a first clothing collection.
The number of garments you manufacture will depend on your startup budget, manufacturer minimums, product costs and how much customer demand you’ve already established.
For a fashion startup with a $5,000 budget, I’d recommend taking a conservative approach.
Rather than spreading your investment across too many designs, focus on a small number of products that have the strongest potential to sell.
For example, if you have allocated $2,000 towards manufacturing and your average production cost is $25 per garment, that budget could theoretically cover 80 garments.
However, this calculation doesn’t account for additional expenses such as freight, import duties, taxes, packaging or unexpected production costs.
You’ll need to calculate your full landed cost before deciding how much inventory you can afford.
Understand Your True Clothing Manufacturing Costs
One of the most important skills for anyone starting a clothing brand is understanding the difference between the manufacturing cost and the actual cost of getting a garment ready to sell.
Your total landed cost may include:
- Garment manufacturing.
- Fabrics and trims, if charged separately.
- Labels and packaging.
- Freight and shipping.
- Import duties and applicable taxes.
- Quality inspections and other production-related expenses.
For example, imagine you’re producing a summer dress.
| Expense | Cost per garment (AUD) |
|---|---|
| Garment manufacturing | $25 |
| Labels and packaging | $2 |
| Allocated freight and import costs | $5 |
| Estimated landed cost | $32 |
If you sell the dress for $99, your gross profit before selling expenses would be $67 per garment, or approximately 67.7% of the selling price.
However, this is not your final business profit.
You’ll still need to account for expenses such as ecommerce platform fees, payment processing, marketing, returns, administration and other business overheads.
For simplicity, this example assumes the $99 selling price and $32 landed cost are being compared on the same tax basis. In practice, Australian GST registration and tax treatment may affect your calculations.
Understanding these costs before manufacturing helps you establish realistic retail prices and avoid selling products that generate revenue but little actual profit.
Always Confirm Production Details in Writing
Before paying your manufacturer, confirm the important production details in writing.
These should include:
- Approved garment designs and technical specifications.
- Fabric types, colours and trims.
- Size breakdowns and production quantities.
- Agreed garment prices.
- Payment terms and deposit requirements.
- Production completion dates.
- Quality standards and inspection arrangements.
- Shipping responsibilities and delivery terms.
- Procedures for handling defects or production discrepancies.
Your approved sample should serve as an important reference for the finished production garments.
Why Quality Control Matters
Even when your samples are perfect, mistakes can occur during bulk manufacturing.
Potential problems include incorrect measurements, inconsistent stitching, fabric defects, incorrect colours or missing garment details.
Where possible, arrange for garments to be inspected during or before the completion of production.
For overseas manufacturing, you may consider engaging an independent quality control service, particularly when placing larger orders.
Discovering manufacturing problems before your garments are shipped can be considerably easier than dealing with defective inventory after it arrives.
Avoid Investing All Your Money in Inventory
One of the most important lessons I’ve learned from building fashion businesses is that having beautiful products doesn’t automatically mean you’ll have a profitable business.
You also need customers.
If you’re launching your first clothing brand, resist the temptation to invest every available dollar into manufacturing.
You’ll still need money for marketing, product photography, ecommerce operations and the unexpected expenses that come with running a business.
A smaller, carefully planned first collection can provide valuable information about which products customers actually want to purchase.
You can then use those insights to guide future production decisions.
The objective of your first clothing collection isn’t necessarily to generate huge profits immediately. It’s to establish a viable product, validate customer demand and create a foundation for a sustainable fashion business.
Tip: when corresponding with manufacturers and getting quotes- make sure you ask about MOQ’s. As a small clothing brand starting out you want to look for suppliers that can do small MOQ’s.
Step 10: Get Pre- Sales to Help Fund Production Costs
While you are manufacturing bulk production- start getting pre-sales of your designs. This can help fund and pay for your production cost. Take photos of your samples, pop them up online – with pre-order details- for a ‘Pre-launch’. You can also wholesale sell your designs and get pre-orders from other boutiques and online stores. Check out our article here on how to get your label stocked in other stores.
Want to Start Your Own Clothing Brand but Don’t Know Where to Begin?
Starting a fashion label is exciting, but learning how to turn your designs into professionally manufactured garments can save you thousands of dollars in costly mistakes.
At La Mode College, our online Start Your Own Fashion Line course is designed for aspiring fashion entrepreneurs who want to learn the practical, industry-based skills needed to develop and launch their own clothing brand.
Learn how to:
- Identify your target customer and develop a commercially viable collection.
- Plan and design a cohesive fashion range.
- Create professional fashion illustrations and technical specifications.
- Understand fabrics, garment construction and manufacturing processes.
- Communicate effectively with clothing manufacturers.
- Navigate sampling, production and the steps involved in launching your fashion label.
Learn from real fashion industry experience, not just theory.
Developed by fashion designer and entrepreneur Annette Miller, who founded and grew her own fashion label, the course focuses on the practical knowledge and commercial decisions involved in bringing a fashion collection to market.
Whether you’re starting with $5,000 or planning a larger launch, having the right knowledge before investing in production can make all the difference.
Get a Free Course Brochure Here:

Some of the topics we include in the ‘Start Your Own Clothing Brand’ course include:
45 ‘Mini’ E-classes and Topics (include downloadable resources in each to help you!)
Eclass 1- Getting Started- Identify a Profitable Niche, Putting a Range Plan Together
Eclass 2- Designing Your Collection Professionally: (Story Board, Colour Palette, Illustrating your designs with croquis.)
Eclass 3- Preparing Your Designs for Bulk Production- Including How to Do a Trade Drawing
Eclass 4- Presenting Your Collection Professionally- Using Illustrator To draw Your Designs
Eclass 5- Where to Source the best Fabric for Your Designs
Eclass 6- Printing Your Own Fabric and Making Your Designs Stand Out from the Crowd
Eclass 7- Preparing for Manufacturing Your Designs
Fashion Mentoring Eclass 8: Manufacturing Tips- 4 Steps to Getting Beautiful Garments made in Bulk!
Fashion Mentoring Eclass 9: Labelling
Fashion Mentoring Eclass 10: Funding
Fashion Mentoring Eclass 11: Register a Business Name
Fashion Mentoring Eclass 12: Manufacturers Contact List
Fashion Mentoring Eclass 13: Importing
Fashion Mentoring Eclass 14: Patternmaking
Fashion Mentoring Eclass 15: How to setup an Online store through Facebook
Fashion Mentoring Eclass 16: Promotion Ideas for your Online store through Facebook
Fashion Mentoring Eclass 17: How to Get More Sales!
Fashion Mentoring Eclass 18: How to find Fashion Buyers!
Fashion Mentoring Eclass 19: How to Edit Photos of Your Design
Fashion Mentoring Eclass 20: How to Create a Fashion Brochure
Fashion Mentoring Eclass 21: Avoiding Manufacturing Disasters!
(Supplier quality checklist template)
Fashion Mentoring Eclass 22: How to Get Your Garments Made in the Right Fit!
(Spec sheet measurements)
Fashion Mentoring Eclass 23: How to Market Your Fashion Label!
(Marketing strategies)
Fashion Mentoring Eclass 24: How to get Free Publicity!
(Press release templates)
Fashion Mentoring Eclass 25: How to Triple Your Profits!
(Video PowerPoint)
Fashion Mentoring Eclass 26: Packaging!
Fashion Mentoring Eclass 27: Packaging For Online Sales!
Fashion Mentoring Eclass 28: How to Present Your Designs to a Fashion Buyer!
Fashion Mentoring Eclass 29: Range Showings
Fashion Mentoring Eclass 30: Purchase Orders and Trading Terms
Fashion Mentoring Eclass 31: Buyers Terminology and Retail Talk: Impress the Buyer with your knowledge of retail terms
Fashion Mentoring Eclass 32: Retail Formulas
Fashion Mentoring Eclass 33: Top Tips for Creating an Impressive Logo for Your Fashion Line
Fashion Mentoring Eclass 34: Marketing Your Fashion Label for Free- Using Pinterest
Fashion Mentoring Eclass 35: Instagram Marketing for Your Fashion Label
Fashion Mentoring Eclass 36: Quick and Easy Pattern Grading
Fashion Mentoring Eclass 37: Online Store Mastery- Part 1- Registering a Domain Name, getting hosting, and choosing an online- platform to build your site
Fashion Mentoring Eclass 38: Online Store Mastery- Part 2- Building Your Online Store
Fashion Mentoring Eclass 39: Online Store Mastery- Part 3- Setting Up Your Online Store
Fashion Mentoring Eclass 40: Online Store Mastery- Part 4- Designing Your Graphics and Banners
Fashion Mentoring Eclass 41: Online Store Mastery- Part 5- Designing Killer Product Pages
Fashion Mentoring Eclass 42: Online Store Mastery- Part 6- Sizing Charts and Product Descriptions
Fashion Mentoring Eclass 43: Online Store Mastery- Part 7- Adding Product to Your Online Store
Fashion Mentoring Eclass 44: Online Store Mastery- Part 8- Adding Payment Methods
Fashion Mentoring Eclass 45: Online Store Mastery- Part 9 Launching Your Store!